How to Install TeamViewer on Ubuntu 24
In this tutorial, we’ll show you how to install TeamViewer on Ubuntu 24 and set up unattended remote access by switching to the X11 display server.
1. Downloading TeamViewer for Ubuntu 24
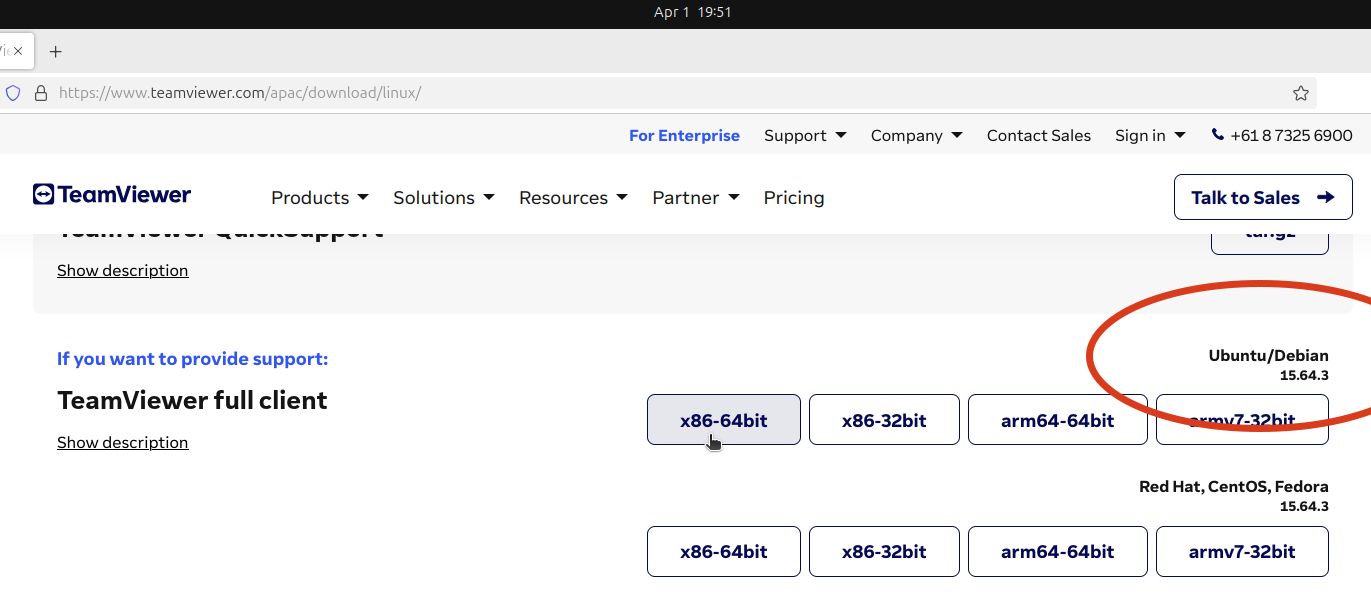
First, go to the TeamViewer Linux download page and download the 64-bit package for Ubuntu/Debian.
2. Installing TeamViewer
Once the download is complete, open a terminal and install the gdebi-core package:
sudo apt update
sudo apt install gdebi-core
Then, navigate to your download folder and run the gdebi command to install the TeamViewer .deb package:
sudo gdebi teamviewer_15.64.3_amd64.deb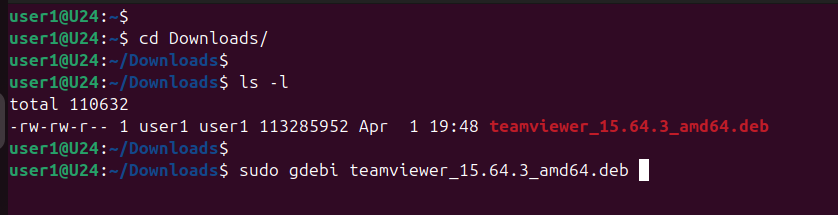
3. Starting TeamViewer
After the installation process is complete, you can launch the TeamViewer application. Once launched, you will be presented with a unique ID and a password. You can now attempt to establish a remote desktop connection to your computer from another device using this provided TeamViewer ID and password.
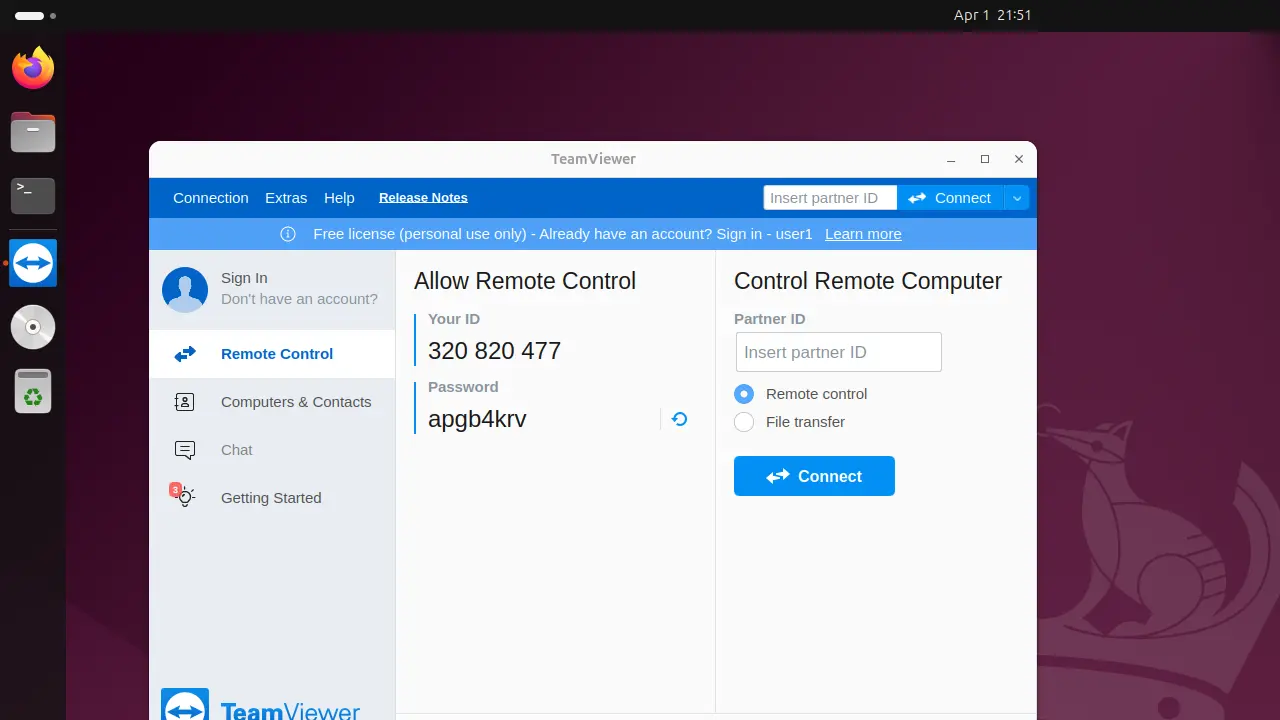
However, the remote desktop connection will not fully initiate until it is explicitly approved from the Ubuntu machine itself. This is because Ubuntu uses the Wayland display server by default, which doesn’t support unattended remote access.
4. Switching to X11 for Unattended Access
To enable unattended access, log out of your user account. On the login screen, click the gear icon in the bottom-right corner and select Xorg.
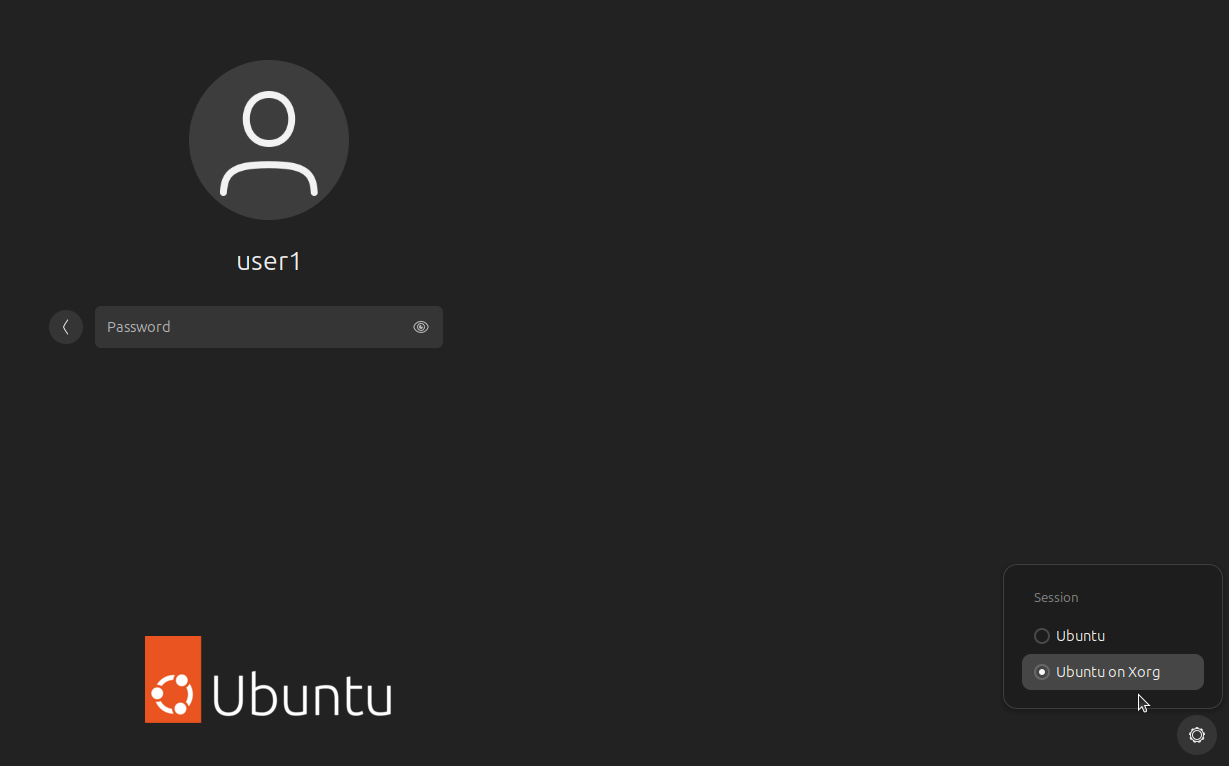
Log back in, and now you’re using the X11 display server. With this, TeamViewer should allow unattended remote desktop access.
Uninstalling TeamViewer
If you want to uninstall TeamViewer, First, use the apt purge command to uninstall it. After that, run apt autoremove to clean up any unnecessary dependency packages.
sudo apt purge teamviewer
sudo apt autoremove