How to Install VirtualBox guest additions on Ubuntu 18.04
This tutorial explains how to install VirtualBox Guest Additions on an Ubuntu 18.04 Virtual Machine.
After installing Ubuntu 18.04 on VirtualBox, next you need to install VirtualBox Guest Additions on the virtual machine. The VirtualBox Guest Additions package unlocks additional features in the virtual machines that are not enabled by default. The features include, folder sharing, mouse pointer integration and shared clipboard between the host and the VM.
Following are the steps to install VirtualBox Guest Additions on Ubuntu 18.04 LTS Bionic Beaver:
- Install dependency packages.
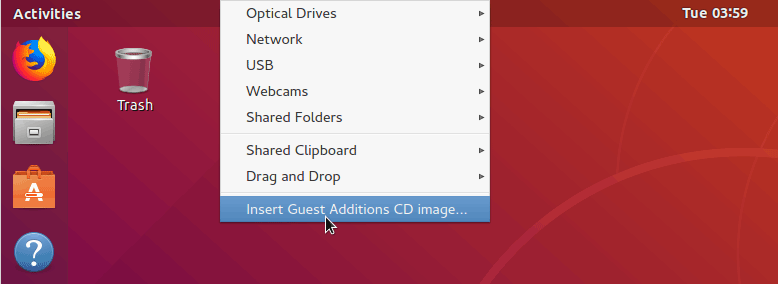
- Insert the guest additions CD image.
- Mount the CD image.
- Execute the VBoxLinuxAdditions.run file.
First, start the Ubuntu 18.04 VM. Then, login to the system, open the terminal and install following dependency packages:
sudo apt-get update
sudo apt-get install build-essential dkms linux-headers-$(uname -r)
Click on the Devices menu and select “Insert Guest Additions CD image”.
Mount the Guest Additions CD image to the /mnt directory:
sudo mount /dev/cdrom /mnt/Next, cd into the /mnt and run the VBoxLinuxAdditions.run file.
sudo ./VBoxLinuxAdditions.run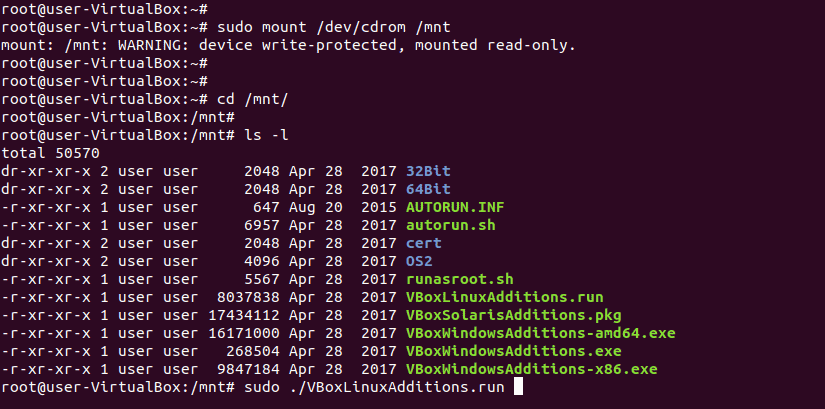
After the installation process is finished, you may need to reboot your Ubuntu 18.04 virtual machine to activate new features enabled by the guest additions.