How to Install MySQL in Ubuntu 18.04 Server
In the previous tutorial we installed PHP on Ubuntu 18.04. In this section, I’ll cover how to install MySQL Server on Ubuntu 18.04 Bionic Beaver. MySQL is the most popular and widely used relational databases in the World today and is commonly used with PHP to create dynamic web sites.
The MySQL server also available from the Ubuntu apt repository.
To install MySQL, Run:
sudo apt-get update
sudo apt-get install mysql-server
After the installation is done, run the systemctl command to check the server status:
sudo systemctl status mysql.service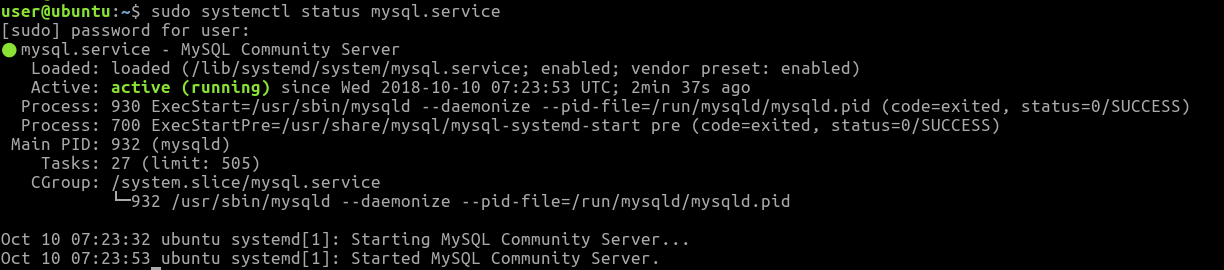
MySQL in Ubuntu 18.04 should start automatically, if not run the following two commands to start and enable MySQL server:
sudo systemctl start mysql.service
sudo systemctl enable mysql.service
Log in to MySQL root Console
MySQL root user on Ubuntu don’t have a password and its use auth_socket plugin to authenticate the root user. You can only login to the MySQL root using the system root account or using the sudo command:
sudo mysql
Welcome to the MySQL monitor.  Commands end with ; or \g.
Your MySQL connection id is 3
Server version: 5.7.23-0ubuntu0.18.04.1 (Ubuntu)
Copyright (c) 2000, 2018, Oracle and/or its affiliates. All rights reserved.
Oracle is a registered trademark of Oracle Corporation and/or its
affiliates. Other names may be trademarks of their respective
owners.
Type 'help;' or '\h' for help. Type '\c' to clear the current input statement.
mysql>
If you want to set mysql root password, login to the console and run the ALTER USER command as follows:
ALTER USER 'root'@'localhost' IDENTIFIED WITH mysql_native_password BY 'new-password';Note that we also changing the authentication method from auth_socket to mysql_native_password.